Written collaboratively by David Graper and Peter Schaefer.
As the weather warms in late winter and early spring sap in maple trees begins to flow. For many people that live in the Northeastern part of the United States, that means that maple syrup season has arrived. However, producing maple syrup is not well known in this part of the country.
Most people think that only sugar maple trees (Acer saccharum) can be used. But in fact, silver maple (Acer saccharinum), and even boxelder (Acer negundo), another maple that produces a clear sap can also be used to make a tasty syrup, similar to the syrup that is made from sugar maple. Canada is the world leader in maple syrup production, making 80% of the sweet treat. But generally anywhere along the northern tier of states the right climate exists to successfully produce syrup from several maple species.
Tree Selection
Dr. Peter Schaefer, began experimenting in his home yard, tapping silver maple trees about eight years ago and found that he could be quite successful. Dr. David Graper has also made syrup from his yard, but used boxelder as his source of sap, also known as Manitoba maple. As it turns out, there are several tree varieties throughout South Dakota that are suitable for tapping maple syrup; below are a few of the most-common types.
All of these maples have similar seeds, called samaras. The actual seed is attached to a flat wing-like structure. When the seeds are mature, they fall from the tree and spin or helicopter to the ground. Silver maple seeds mature in the spring and are generally off of the tree by early June. Seeds of sugar maples and boxelders mature in the fall, but some of the samaras may still be attached to the tree in the winter and aids in identifying whether or not it is a maple.
Before starting to make maple syrup, you need to have access to some of the maple trees mentioned below. If you don’t have many maples in your yard, check your neighbor’s yard. Perhaps they would be willing to help you out in allowing you to tap their trees and maybe even help in boiling down the sap later on for a share of the syrup. Note that just two large silver maples (18” diameter) will produce enough sap to make a gallon of syrup.
Silver Maple
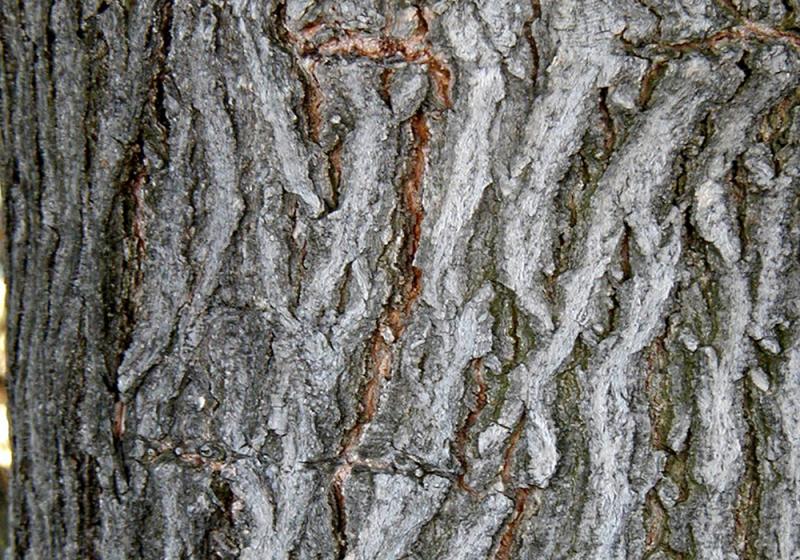
Silver maples are a very common tree in many communities in eastern South Dakota. They are easy to grow and get large very quickly. Their leaves have the typical maple leaf shape but are much more deeply dissected and have a silvery underside. Another good identifying characteristic is that the leaves are frequently attacked by the maple bladder gall mite. This minute pest causes little green to reddish bumps to develop on the undersides of the leaves. It does not harm the tree but is a good characteristic to help identify silver maples. The bark is gray-brown and will often form elongated plates that curve outwards with age. Silver maples are also planted in shelterbelts. They have soft, brittle wood so they can be prone to storm damage.
Amur Maple & Hybrids
It turns out that there are other species of maple that can be used that can be found growing here in South Dakota, such as Amur Maple (Acer ginnala) and some of the hybrid maples, usually a cross between silver maple and red maple. In order to be tapped trees need to be at least 10-12” in diameter at about 4 feet above ground. Larger trees can even have a second tap or spile installed to collect even more sap.
Boxelder Trees
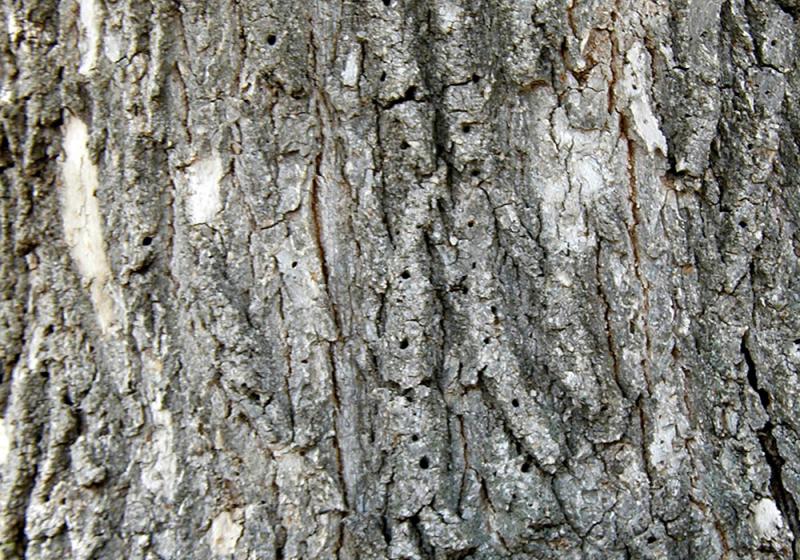
Boxelder trees are also fast-growing trees with rather brittle wood. They can be found growing across the state, but are not often planted because they are generally not considered as ornamental or attractive as other species of maples. They are also very sensitive to certain types of broadleaf herbicides, such as 2,4-D, showing significant leaf damage from nearby applications. The leaves of boxelders are quite different from the other maples in that they are pinnately compound, meaning that they have three leaflets per leaf instead of the larger, lobed leaves of the other maples. The bark is gray-brown and with age develops fairly thick, irregular ridges. Boxelders are also known for producing lots of suckers at the base of the tree.
Sugar Maples
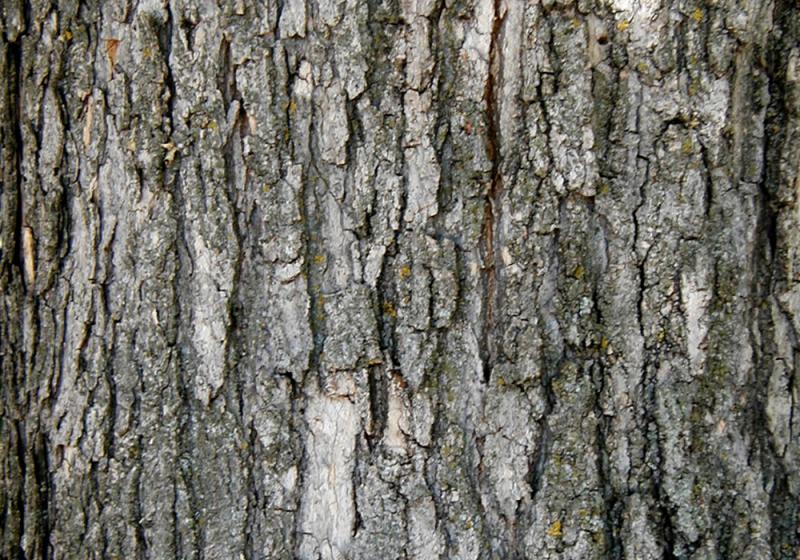
Sugar maples may be found in some people’s yards, mostly along the far, eastern and southeastern parts of the state. This is the tree that provides us with the vibrant fall color that makes maple forests farther east so colorful in autumn. The bark is gray-brown with occasional patches of white. Unlike silver maples, sugar maples have very hard wood and a much slower growth rate.
Harvesting Sap
Equipment Needed
Some of the basic equipment needed includes a drill, taps - known as spiles, some collecting containers, storage containers, filters and something to boil the sap in – preferably a flat, large pan, a thermometer and finally some containers to store the finished syrup. Probably the easiest way to get started is to go online and search for maple syrup supplies and order a starter kit that will have everything you need to start out tapping a few trees. A hydrometer to assist in determining when you have fully cooked down your sap to syrup might also be a good investment, but you can also determine that by using the thermometer. A digital thermometer that can read temperatures up to about 250° F work well. A starter kit is a good place to begin so that you get a feel for the process and find out if you want to get into this hobby in a bigger way.
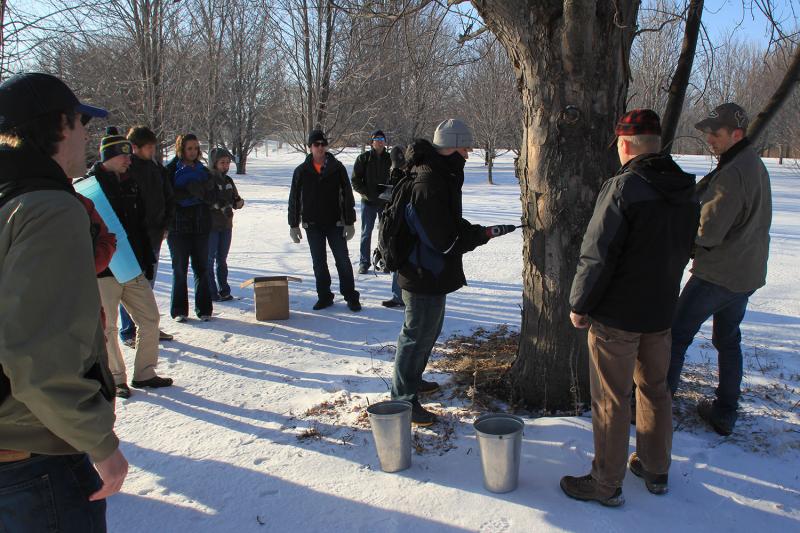
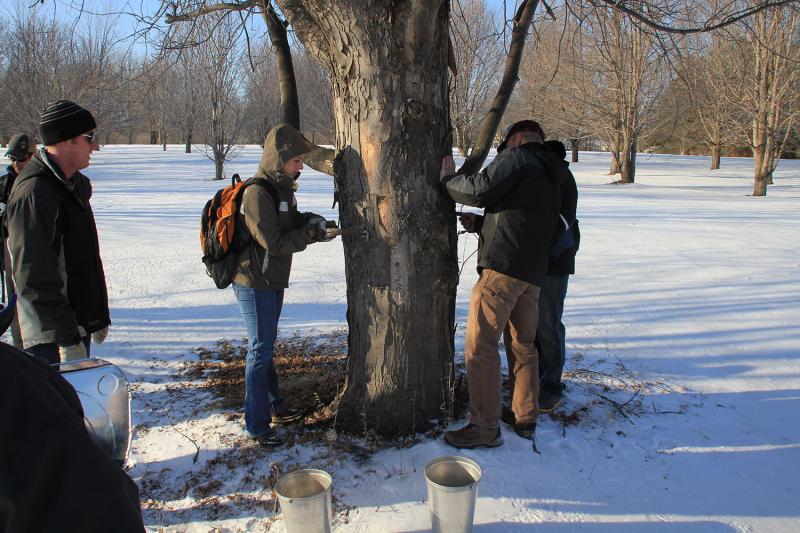
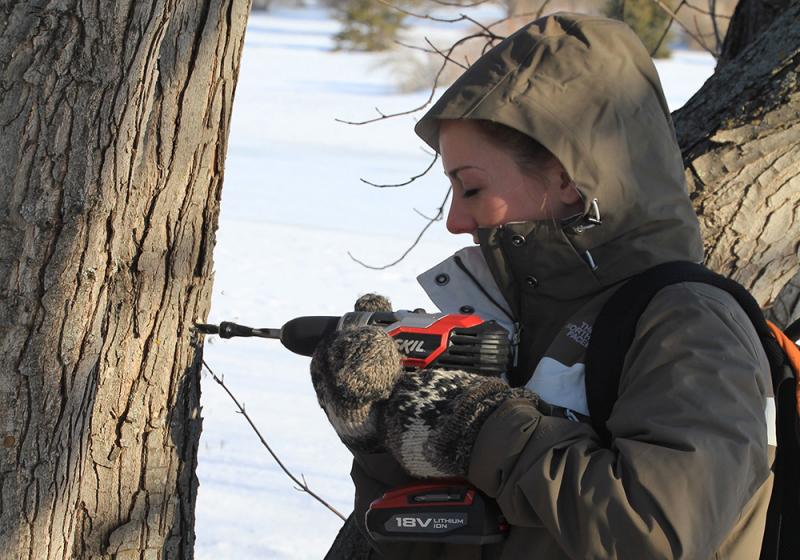
Spile Installation
Spiles should be installed in the trees before typical sap flow begins, that means by the end of February or early March for most people. Spiles come in two sizes, designed to be installed in either a 5/16” or 7/16” hole that you will drill into the tree about 1 1/2 to 2” deep. Wrap some tape around the drill bit to indicate the depth you want. An ordinary drill bit will work fine. Angle the hole up slightly so that sap will easily flow out of the hole. Remove any wood chips from the hole by blowing in it or use a small piece of wire to get them out. Position the spile in the hole so that it is pointing up the right way, which will vary depending on the type of spile you are using, but generally you will see the tip open on the top where the sap will flow out. The spiles designed to be hooked to a small collection tube should be positioned so that this one points downward. Carefully tap the spile into the tree until it is snugly seated in the hole. The spiles are tapered so that they will go in easily but become tight in the hole as you tap them in farther. If you tap them in too far, you might split the wood, causing a poor seal.
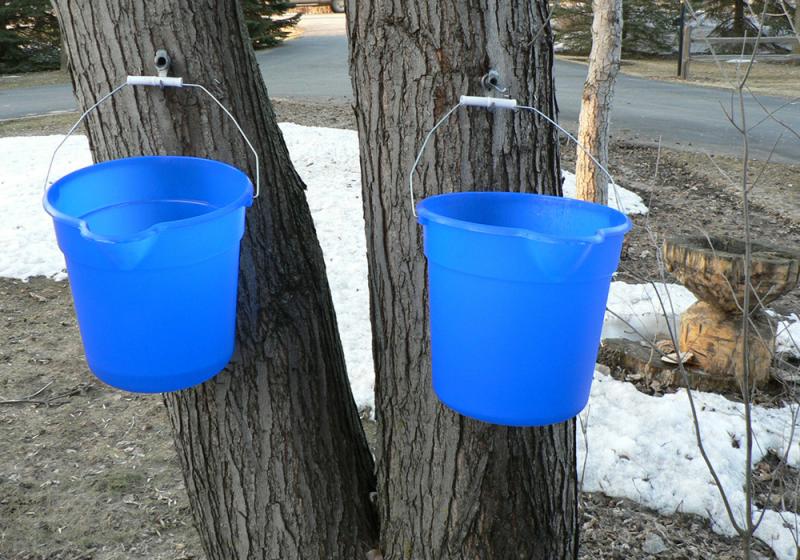
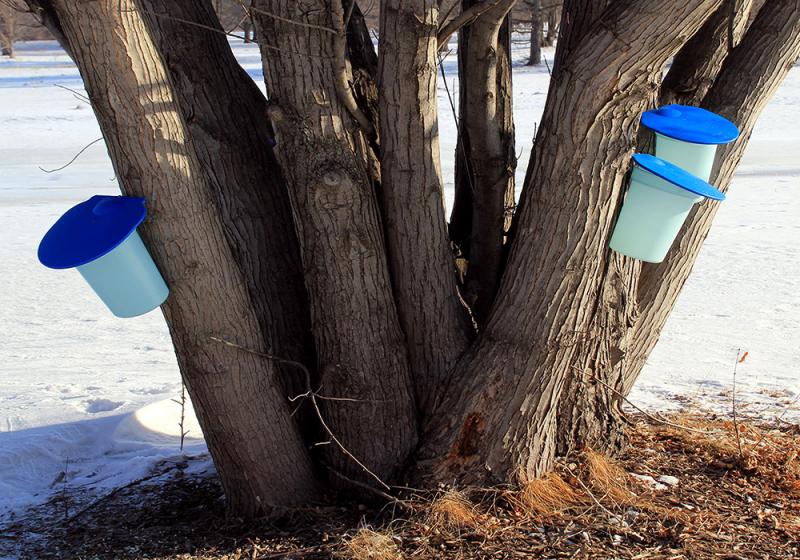
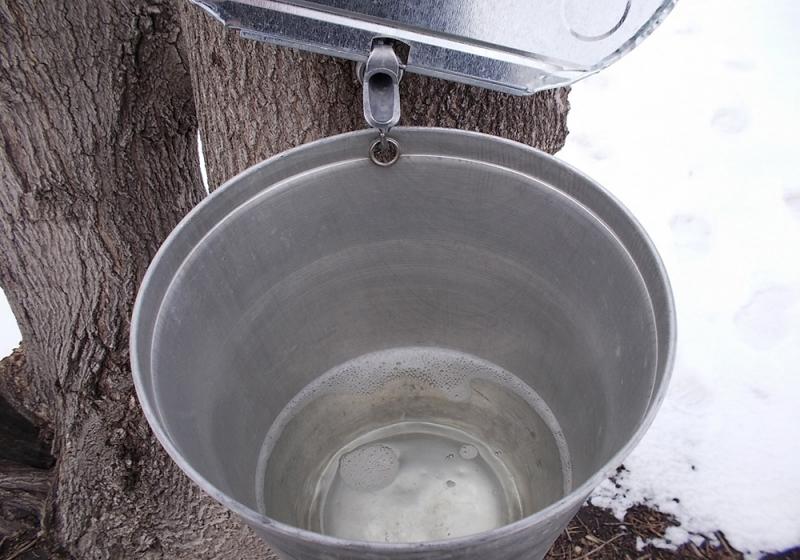
Sap Collection
Attach the bucket to the spile, either by hanging it from the spile or by inserting the tube into it. A good method that we have found when tapping trees at McCrory Gardens is to purchase inexpensive 5-gallon plastic buckets with covers. Drill a hole, large enough to accept the tube near the top of the bucket, and insert the tube through the hole. Try to position the tap in the tree at the right height above the ground so that the bucket can be set on the ground. It is important to keep the collection buckets covered so that bird droppings, twigs, rain, snow and other debris do not get into the sap. Weigh down the bucket with a rock or brick to keep the wind from tipping it over. The more traditional metal or plastic 2-gallon buckets can also be used equipped with the large hook that hangs down below the spile. There are also other systems that use heavy-duty plastic bags and an aluminum frame that attaches to another type of spile. You can even use a clean milk jug to collect the sap. Just cut a hole in the jug near the top large enough to allow it to fit over the spile. You may want to also support the jug with some twine or wire so that it does not fall off the spile when it is full of sap. We now prefer using the larger 5-gallon buckets because we do not have to worry about emptying them as frequently – a good producing tree can yield one to three gallons of sap in a good day. But as much as five gallons of sap from one tap can be collected in one day from some boxelder trees, so a smaller container might need to be emptied more than once per day to gather all the sap.
Weather Considerations
Since wind is almost a constant in South Dakota, after installing the spiles wait until the weather warms up to install the collection buckets so they do not blow away. Daytime temperatures need to get above freezing, preferably above 40° to get the sap flowing. Nighttime temperatures must drop below freezing, preferably down to about 25° F to get maximal flow. Wait until the weather forecast looks like these conditions will exist before you put out your collection containers. Often one or two trees start flowing in a yard before the rest and can be used as indicator trees. Keep an eye on them, to see when sap starts to drip out of the spiles and know when collection containers should be installed on the rest of your trees.
Sap Storage
Since it takes between 35 and 45 gallons of sap to make a gallon of syrup, you probably will want to store your sap until you have a larger amount to boil down to make at least a quart of syrup. However, fresh sap can really only be stored for about a week at 40°F before bacteria will start to grow in it, turning it cloudy. It will likely still be ok to use since it will be boiled for such an extended length of time but it may change the flavor. It was often thought that the sugar content of maples other than the sugar maple was too low, making their use for maple syrup impractical. We have found the sugar content of silver maples to be about 3%, which is similar to that of the sugar maple which can range from 2 to 5%. Boxelders sap has a similar sugar content making all three species suitable for syrup production.
Making Syrup
Cooking Equipment
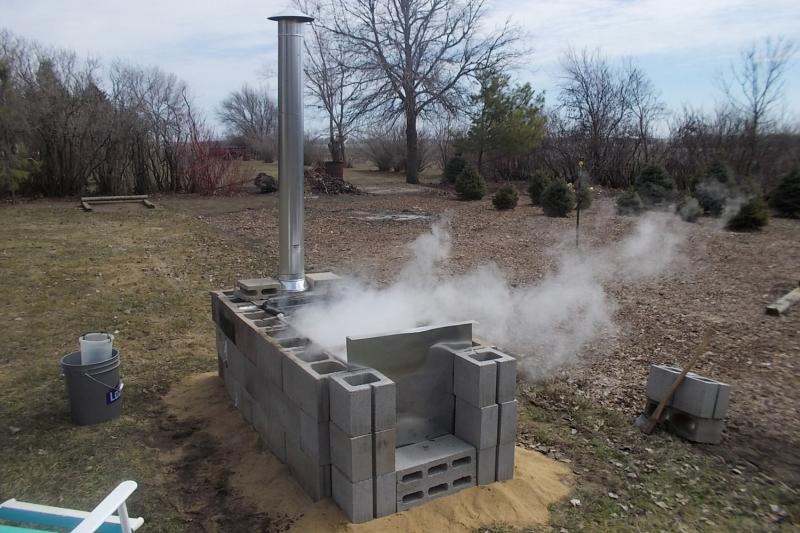
Converting your maple sap into syrup is the most difficult part of the process because it takes a lot of time, and you will need to do this outside your home. If you start with 40 gallons of sap collected you would not want 39 gallons of water evaporated into slightly sweet steam, inside your home. It could lead to disastrous results. So, typically the sap is boiled outdoors, often over a wood fire.
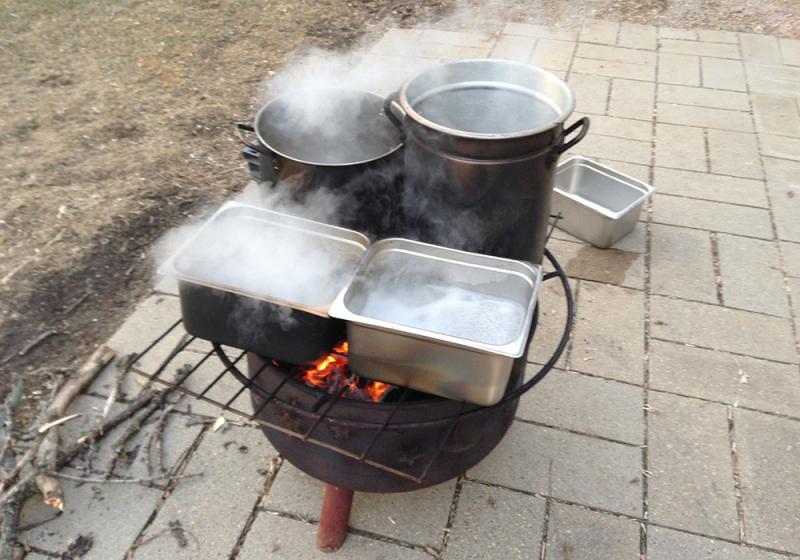
Small amounts of sap can be cooked down over a propane fired turkey fryer but a flat, wide pan provides a much larger surface area to create more steam to remove excess water more rapidly. Flat, steam-table pans work well as do old turkey roaster pans, or ordinary kettles can also be used.
Something as simple as a fire ring in your backyard can be used, or a structure out of concrete blocks can be constructed to support the pans and allow a place to build the fire beneath the pans. Containing the fire beneath the pans to concentrate the heat will create a more efficient system and need less wood to evaporate off the excess water.
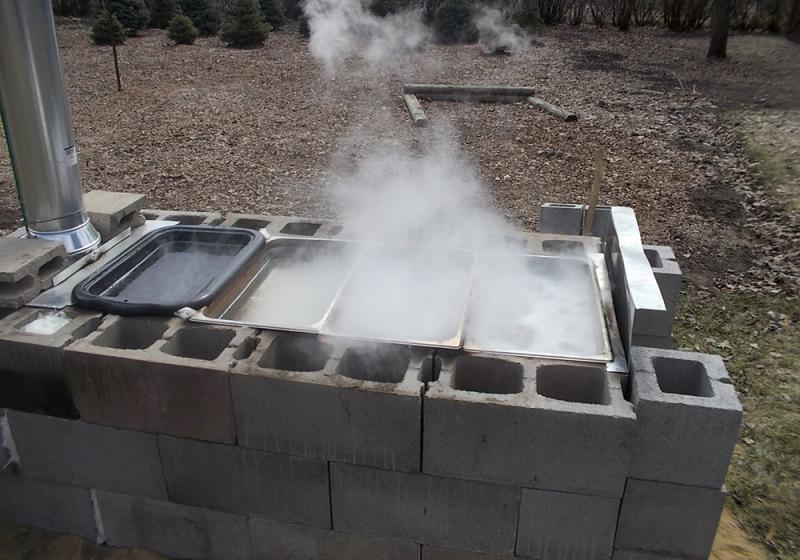
Boiling Sap
Bring the sap in the pan or pans to a rolling boil and try to maintain it. Avoid adding an excess of cold sap to a boiling pan or you will then have to wait for it to heat up again to start releasing more steam. Try just trickling in a bit at a time or use two or three pans – the first to act as a warming pan, the second to boil the sap initially, then transferring the sap into the final pan to finish boiling off the majority of the excess water.

As the water is boiled off, the color of the boiling sap gradually gets darker. The temperature of the boiling sap will slowly rise from the typical boiling point of water at 212° F to finally reach the boiling point of syrup at about 219° F at sea level. Be careful as you get close to the final temperature because the sap is more likely to boil up. The bubbles created will also become lighter in color and larger in size as you approach the end point. If you exceed the 219° F temperature there is a good chance that it may boil over and burn. It is a good idea to stop at about 218° F and then finish the syrup over a stove or turkey fryer where you have more control of the process than over an open fire.
Bottling & Storage
Once the final temperature is reached, it is ready for filtering and can be poured into storage bottles. There are special filters used in filtering the syrup. The minute particles, sometimes called “sugar sand” are so fine that they will pass through ordinary filters, such as a coffee filter. It would be better to invest in a filter made specifically for filtering syrup. You can also allow the syrup to sit for several days in a closed container, allowing the fine particles to settle; then pour off the clear syrup from the top. Ordinary pint jars may be used for storage but plastic maple syrup bottles may also be purchased for this purpose. To assure a proper, prolonged conservation the syrup should be at least 180° F before you put it into the storage container.