In the middle of the winter when gardeners are getting anxious to get their hands back in the soil, there is one seed starting technique that gives growers the opportunity to start seeds as early as December or January. Winter sowing is a technique often used to start seeds that have a requirement for cold stratification. Cold stratification is a process that uses temperature and moisture to soften the seed coat and break dormancy. Seeds that require winter sowing are often from native plants that will not germinate without a period of cold stratification; however, winter sowing can also be used for many other plants that are propagated by self-sowing, reseeding, or that say they are frost tolerant or can be planted in early spring or late fall.
Winter Sowing Overview
Winter sowing was defined by the U.S. Department of Agriculture as a propagation method used throughout the winter where temperate-climate seeds are sown into protective vented containers and placed outdoors to foster a naturally timed, high-percentage germination of climate-tolerant seedlings. The technique was originally developed by Trudi Davidoff on her website, Winter Sown. The website is no longer functional, but her ideas have spread, and many gardeners from numerous growing zones are having success with winter sowing.
Why Winter Sow?
Winter sowing allows gardeners to get a jump start on seed starting. The process is easy, inexpensive, uses recycled materials, produces a lot of seedlings, and it doesn’t take up indoor space or use electricity for grow lights.
Advantages of Winter Sowing
Winter sowing mimics the actions of the winter outdoor conditions, where seeds would naturally overwinter before germinating in the spring. This includes being insulated by leaves and snow and experiencing cycles of cold, warm, and wet conditions. In winter sowing, you are using Mother Nature to your advantage, while keeping the seeds protected and separated. Winter sowing also keeps the seeds safe from being washed away or eaten by bugs and birds. Winter sowing and then transplanting the seedlings also gives you more control over the final plant placement.
Timing and Plant Selection
When to Winter Sow
Native perennials are best winter sown from December through February. They can be started as late as March if you live in a colder climate, but the germination rate may not be as high if the time required for cold stratification before germination has not been met.
Cold-hardy annuals, perennials, and vegetables can be started later in the winter or in early spring, such as February through April, depending on climate and seed type.
Check the South Dakota Mesonet freeze/frost dates map for information specific to your location.
What to Winter Sow
- Native plants that require cold stratification. Cold stratification will be indicated on the seed packet, usually with a germination code. For example, “C30” means the seeds should be stratified at least 30 days before planting.
- Perennial flowers or annuals that self-sow/re-seed or are cold tolerant.
- Alliums.
- Frost-tolerant greens, such as spinach and certain lettuce varieties.
- Herbs that self-sow, such as dill, cilantro/coriander, and fennel.
Things to consider
In our South Dakota climate it is not recommended to winter sow seeds from heat-loving crops or those that require warm soil temperatures for germination, such as members of the Solanaceae or Cucurbitae family. Additionally, many winter sowing online resources may have information and recommendations from a wide range of growing zones that are much milder. Although vegetable varieties, like brassicas, are cold-hardy crops, the seeds germinate better in warm conditions and should not be started outside too early. It is best to refer to a seed germination chart to make sure that the seeds you would like to winter sow have the appropriate germination conditions met (see the OSU Extension Vegetable Seed Germination Chart for more information).
How to Winter Sow
Supplies Needed
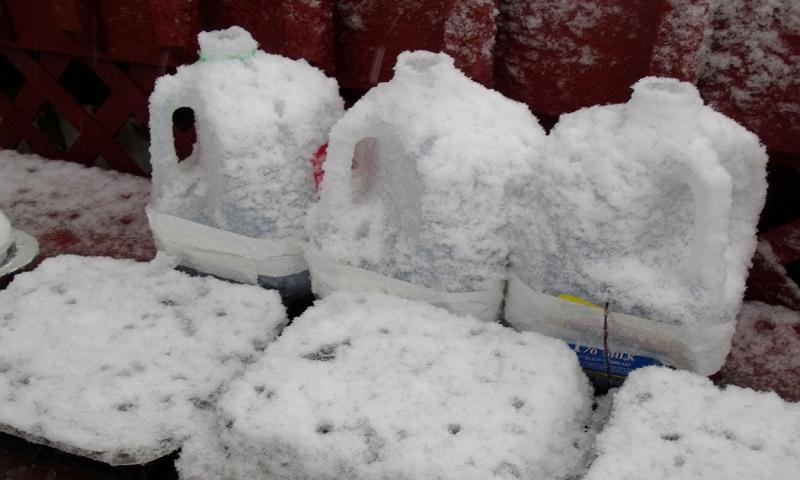
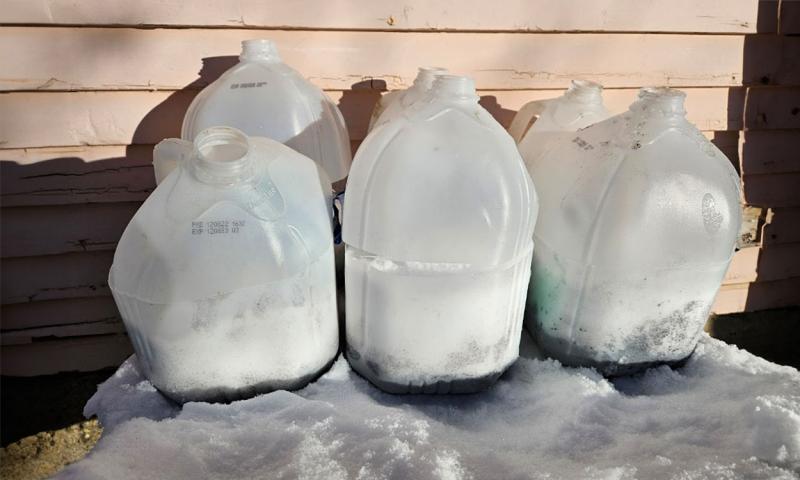
- Plastic containers: transparent milk or water jugs, pop bottles, or salad containers.
- Scissors, knife, or box cutter.
- Screwdriver or sharp object for poking holes in the containers.
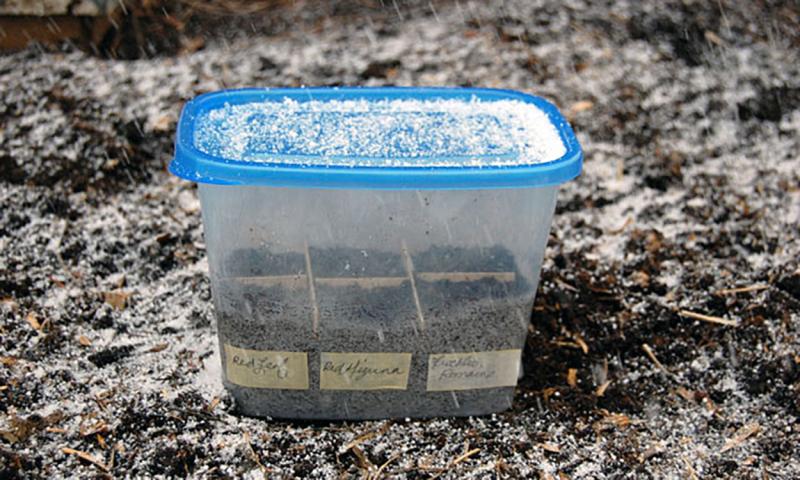
- Seed starting media.
- Tote, large garbage bag, or other material to use as a work surface when indoors.
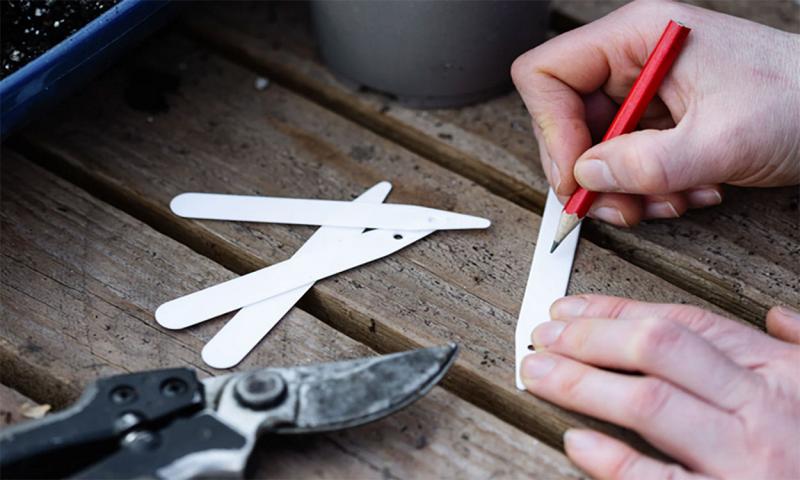
- Permanent marker, laundry marker, or labeled plant tags.
- Duct tape, pipe cleaners, or zip ties for closing the containers.
Step-by-Step Guide
Step 1
Start with a clean container. If you are re-using a milk jug, pop bottle or other container, be sure to wash it out with warm, soapy water prior to sowing. Any transparent plastic container that can be opened and closed can work for winter sowing.
Step 2
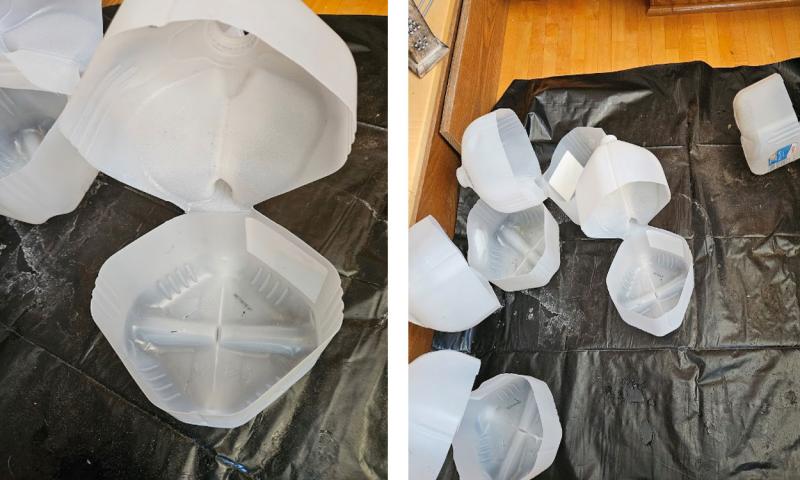
Use a scissors, box cutter, or serrated knife to carefully cut around the container approximately 4 inches from the bottom so that it can be opened to add soil and seeds.
If using a gallon jug, do not cut the area where the handle is attached, so that it can act as a hinge. If using a salad container, it does not need to be cut.
Step 3
Use a nail, screwdriver, or other sharp object to carefully poke drainage holes in the bottom of the container.
Step 4
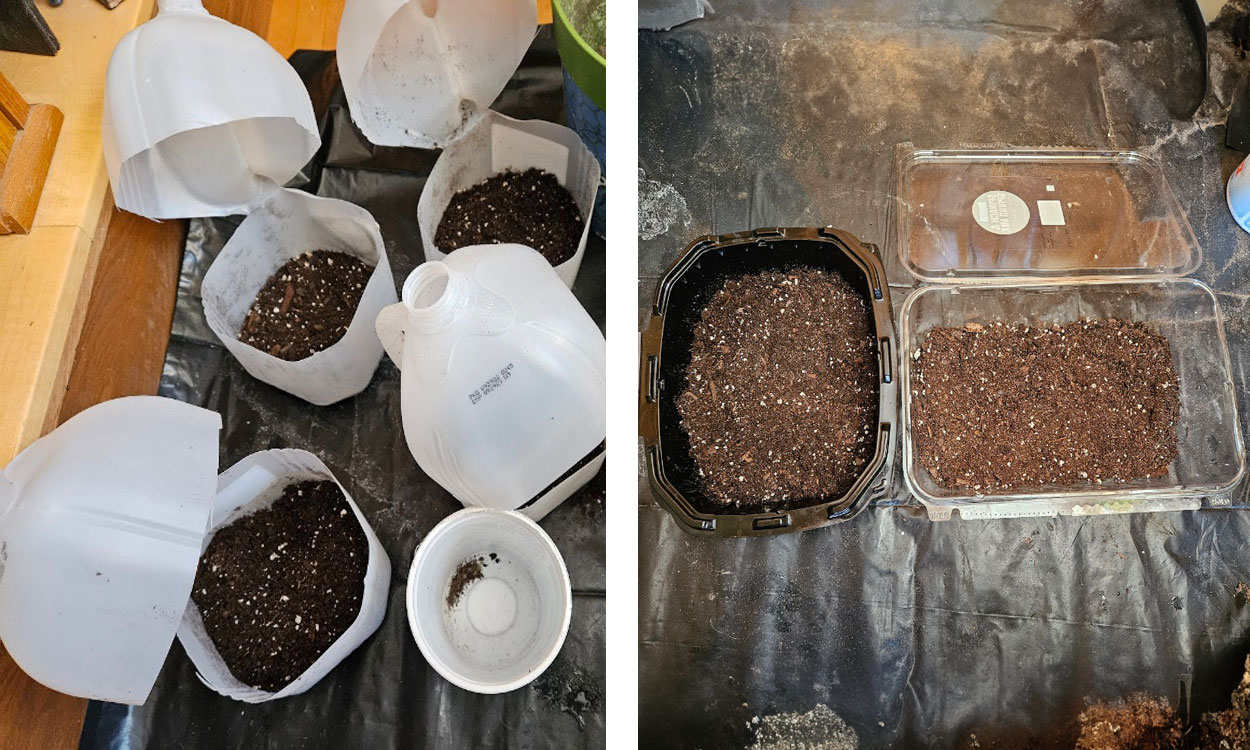
Add 2 to 4 inches of soilless seed starting medium to the container and then moisten. It’s helpful to have something under the containers when moistening the soil so water does not get on your floor.
Step 5
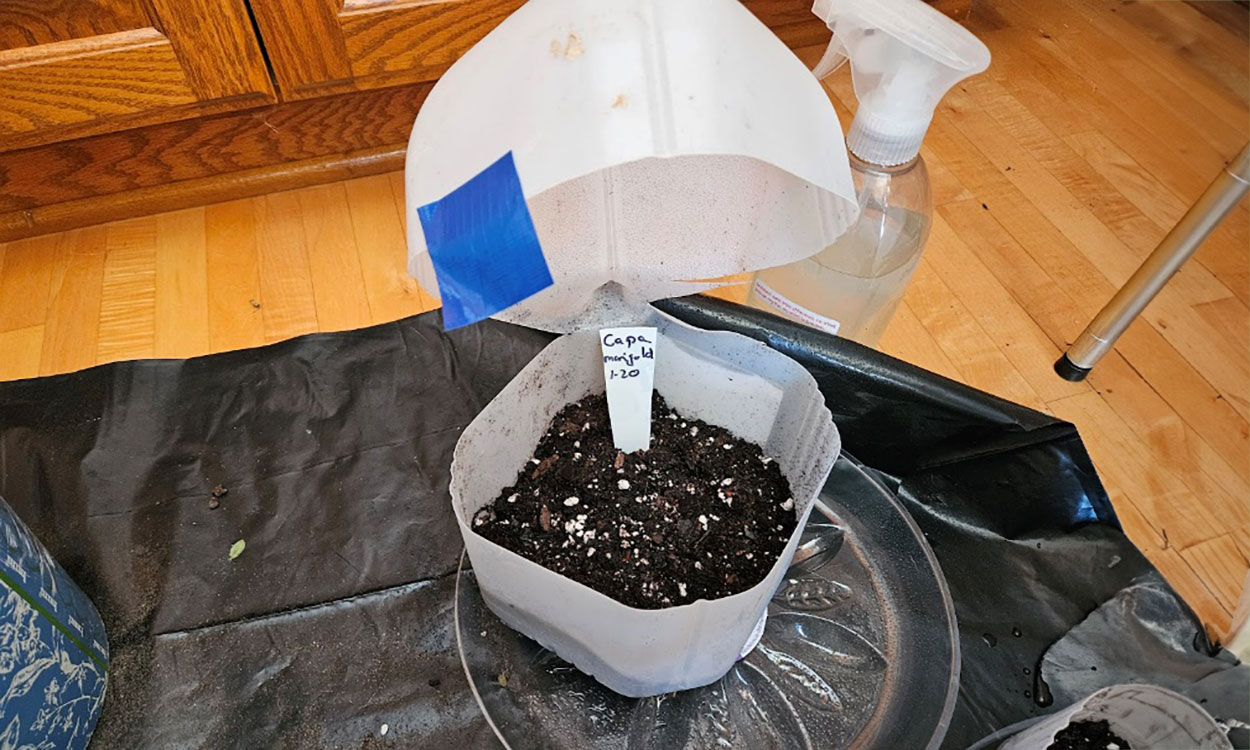
Sow the seeds following the depth instructions on the seed package. Cover the seeds with a thin layer of soil, (unless the instructions say to surface sow or that they need light to germinate) and gently press down on the soil.
Step 6
Close the container. If using a gallon jug, you may need to press the handle hinge area back out to close the jug. If using another container that is completely cut (like a 2-liter pop bottle or water jug), press the top part of the container in around the bottom edges, so that it will slide into the bottom container. Seal the container with duct tape or an equivalent, but leave the cap open so moisture can get in. Alternatively, you can poke holes in the top and bottom of the container in a couple spots and secure it with a zip tie or pipe cleaner instead of tape.
Step 7
Label the container with a permanent marker, but be aware that some permanent markers will not withstand outdoor conditions. Alternatively, label a plant marker and place inside the container before closing. Record the seed type and date planted.
Step 8
Place the containers outside in a sunny, yet protected location. Containers can also be placed in a milk crate or tote to prevent them from blowing over. You can add snow to the inside of the containers when placing them outside. This will mimic outdoor conditions and add more moisture to the media.
As temperatures warm in the spring, the containers act as a greenhouse, warming the soil and allowing germination while retaining moisture. Once the weather warms up and the seedlings grow, the containers can be opened during the day and closed at night. Containers may need to be protected or moved to a garage or inside if a cold period is expected.
Step 9
Transplant your seedlings to the garden once you have 2 sets of real leaves, or when they are approximately 2 inches tall. You can also repot them into individual containers.
Notes
- If temperatures are consistently warm, check the container to make sure the soil hasn’t dried out. Use a spray bottle on the spritz or mist setting to add more water to the container.
- Native perennials may take longer to germinate. If seeds haven’t germinated by May or June, open the container and keep the soil watered regularly. Some native seeds may take several months or longer to germinate.
- If the spring is long and cold, many plants that are winter sown will not germinate until May or June anyway, so if space allows you to start seeds indoors, your plants may be ready to plant before the winter sown plants would be ready. Many plants can be direct sown outdoors in May and June as well. It is important to weigh the pros and cons of winter sowing and be mindful of the germination and growing requirements of the plants you would like to winter sow.
- Don’t be afraid to try new seeds and see what works for you!
Resources
- Starting Seeds in Winter, Lori Voll-Wallace, PennState Extension.
- Winter Seed Sowing, Nicole Flowers-Kimmerle, Illinois Extension.
- Winter Sowing Method, USDA National Agricultural Library Thesaurus.
- Vegetable Seed Germination Chart, OSU Extension.