Written collaboratively by Xufei Yang and Gary Anderson.
The past winter (2022-2023) was a bit rough for many South Dakotans, as a series of major snowstorms caused considerable disruptions to roads, parking lots, and even buildings. Snow load is a major consideration when designing and constructing building structures. For determining the design snow load values, one of the most-cited references is the International Building Code (abbreviated as IBC), which incorporates the standards outlined by the American Society of Civil Engineers (abbreviated as ASCE) 7.
In South Dakota, the snow load provisions are based on the IBC 2015, which was formally adopted by the South Dakota Building Code in 2015. Neighboring states, such as Minnesota, Montana, and North Dakota, which typically experience higher snowfall than South Dakota, have enacted state statutes to further amend the IBC snow load requirements. These amendments ensure that buildings in these states are engineered to withstand the increased snow loads they encounter. It is worth noting that agricultural buildings may have exemptions from certain provisions of the building code and cab be designed with lower snow load values compared to residential buildings. This distinction arises from the relatively lower significance of agricultural structures. As a result, agricultural buildings can be more susceptible to snow-related damage compared to residential ones.
This article centers on post-snowstorm actions, specifically addressing the process of inspecting an agricultural building to verify its structural soundness. Additionally, it guides the safe removal of snow from the building's roof, assuming no structure-related safety concerns arise. The content derives from a handout in the Agricultural Structure and Environment class at South Dakota State University. The article delineates the four critical steps involved in building inspection and snow removal, as follows.
Step 1: Initial Evaluation
Walk around the outside of the building.
Walk around the outside of the building and answer the following questions:
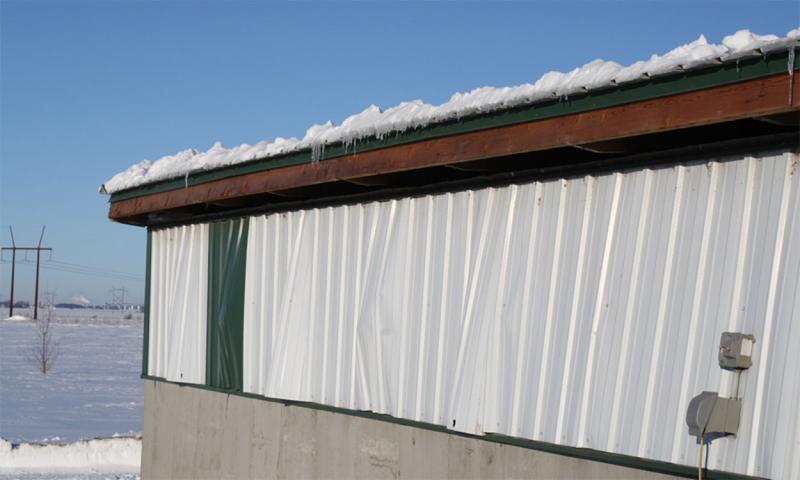
- Is there any evidence, such as sheet buckling or denting of the siding (Figure 2), which may indicate that the knee braces, if used, have slipped?
- Does the roof appear to be lower in the middle of the building than at the end walls?
- Does any portion of the roof appear to be lower than the remainder of the roof?
- Is there any evidence that the walls are pushed out or buckling?
- Does the building, or any portion of the building, appear to be leaning in any direction?
If the answer to any of the above questions is yes, do not enter the building or get on the roof. Seek further assistance before entering or working on the building. If the answer is no to all of the questions, continue the evaluation of the building by moving to the doorway.
Stand at the doorway.
After walking around the building, stand at the doorway and answer the following questions:
- Is the ceiling flat and level? Is the ceiling wavy or bulging?
- Do the knee braces appear to be buckled? Have they slipped relative to the post or ceiling?
If the answer to any of the above questions is yes, do not enter the building or get on the roof. Seek assistance before entering the building or working on it. If the answer is no to all of the above questions, continue the evaluation by looking into the attic area.
Inspect trusses and purlins at the attic entrance before entering.
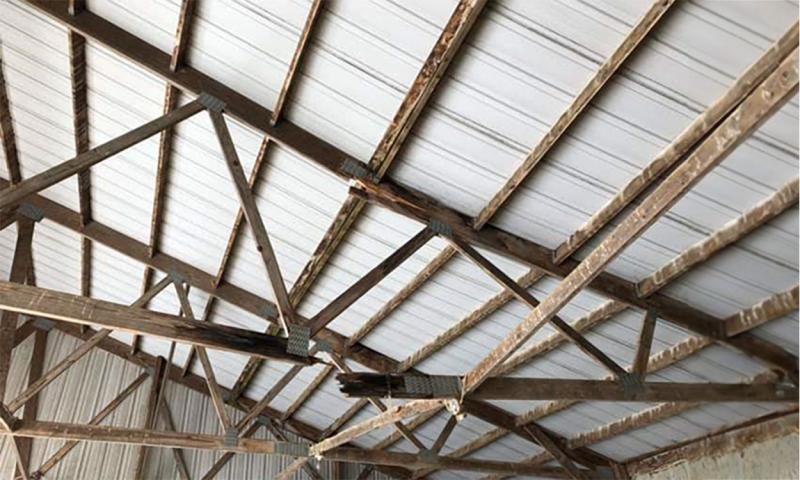
In the attic area, continue the evaluation and answer the following inspection questions:
- Does the top chord appear to be wavy?
- Are any of the truss webs buckling or appear to be bulging?
- Do any large gaps appear between members under the metal truss plates or at nailed joints?
- Do metal roofing or siding components show evidence of sheet buckling?
- Are the metal truss plates bulging or lifting from the truss members?
- Observing the wood color, does it appear that the truss members have pulled away from any plywood or wood gusset plates?
- Do the knee braces appear to be buckled?
- Have knee braces slopped relative to the posts (pushed back to the wall), the truss top chord (pushed up to the roof), or the truss bottom chord?
- Do the purlins appear to be bending downward or twisting?
- Do the walls appear to have buckled?
If the answer is yes to any of the above questions, do not enter the building or get on the roof. See assistance before entering or working on the building. If the answer is no to all of the above questions, move to the next step.
Step 2: Estimating Snow Load
Method 1. Measuring method.
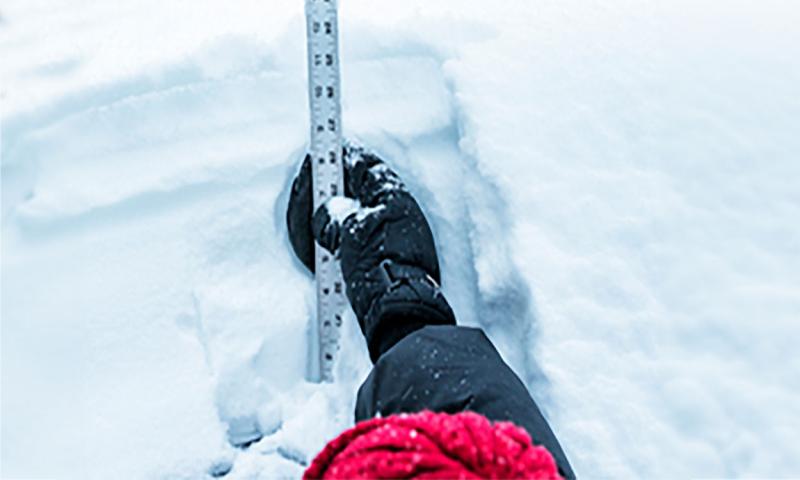
You building’s snow load can be estimated by measuring the depth of the snow using the following steps:
- With a stiff ruler or tape, probe the snowpack at several locations to determine the average depth in inches.
- Determine the roof snow load in pounds per square foot (abbreviated as psf) by multiplying the average depth by:
- 0.5 psf/inch of snow depth for light snow.
- 2.0 psf/inch of snow depth for wind-driven, consolidated, and/or wet, heavy snow.
- 5.0 psf/inch of snow depth for ice.
When probing the snow, you may notice that it is harder to push the ruler into the snowpack at certain depths than others, which indicates that the snowpack is layered with snow of different densities or ice. If this is the case:
- Remove the snowpack from a section of the roof so that the layers may be observed.
- Measure the thickness of each layer in inches.
- Determine the roof snow load in psf by multiplying the depth of each layer by the appropriate density listed above, then adding all the snow layer weights together.
Method 2. Weighing method.
You can also determine snow load by weighing a sample of snow from your roof using the following steps:
- Determine the weight of a container that you will use to weigh the snow removed from the roof.
- Take proper safety measures to ensure safe access to the roof. Leaning a ladder, or otherwise disturbing a building that is excessively loaded, may cause building failure. Plan how to deal with all roof hazards before you approach any roof. Working around or walking on the roof of any structurally unsound building poses a deadly hazard.
- Select a small area of the roof near the eave that is representative of the snow on the roof. Pick an area that is average from the areas you test with a probe.
- It may be helpful to probe several locations on the roof to determine a representative snow depth and density.
- Density is indicated by how hard it is to push the probe into the snowpack on the roof.
- Remove the snow from the selected area and place it in the previously weighed container.
- Use a tape measure to determine the area of the roof in square feet where the snow has been removed.
- Weigh the snow and container.
- Determine the snow weight by subtracting the container weight from the snow and container weight.
- Determine the roof snow load in pounds per square foot (psf) by dividing the snow weight by the roof area it was removed from.
Step 3. Reviewing Building Specifications
Find out the building’s designed roof snow load.

Review your building’s snow load specifications by considering the following tips:
- Building specifications provided to buyers at contract completion often indicate the design roof snow load.
- Contractors and builders often give the snow load in pounds rather than psf.
- The snow load provided by the contractor is the snow load in psf; for example, a 20-pound snow load is a 20 psf snow load.
- If the contract cannot be found, or if the design snow load is not provided, a snow load of 20 psf was often used for agricultural building design in eastern South Dakota in the past. Newer buildings may be designed for 25 psf or 30 psf snow loads. Please refer to the Additional Resources section at the end of this article for typical design snow loads in your area.
Step 4. Removing Snow
Begin the snow removal process.
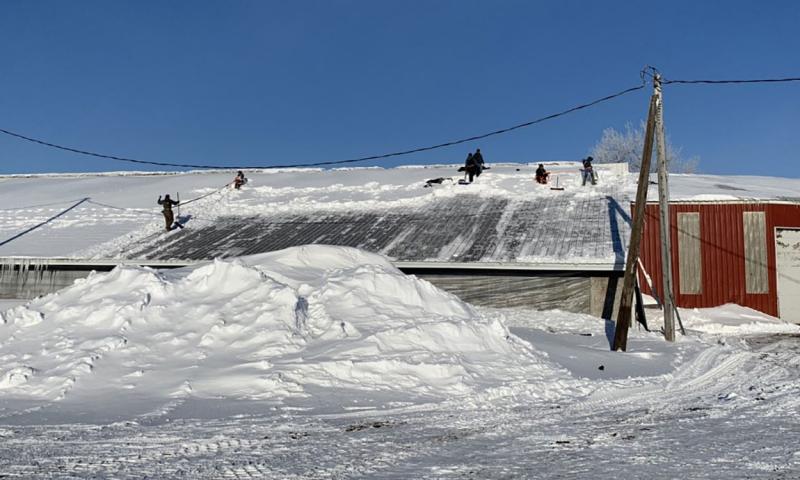
Begin removing snow from the roof, considering the following recommendations:
- Consider removing the snow from the roof of a post-frame building (pole barn) if the snow load estimated is approximately equal to or exceeds the design snow load of the roof, but is less than twice the design snow load, and the answer to all the questions in Steps 1 is no.
- Exercise extreme caution. Human weight on the roof and shifting the distribution of snow may cause the collapse of the roof or building. For the same reason, avoid using snow blowers that could also damage the roof surface.
- Avoid walking on an overloaded roof. If someone must walk on the roof, first develop and review a fall protection plan. Fall protection devices, such as body harnesses, may be required for this work.
- Begin removing snow from the roof utilizing equipment or scaffolding to elevate workers to eave height.
- Use snow rakes or other tools to pull as much snow as possible down from the roof without getting on the roof.
- Re-inspect the building as outlined in Step 1 to ensure that the removal process did not damage the building.
- If no damage is found, continue removing snow, working from the eave to the ridge.
- Hire professionals if possible.
It is very important to remove the same amount of snow from each side of the roof.
- Unbalanced roof loads (one side of the roof loaded significantly heavier than the other side) may cause more damage to the building than larger, balanced loads.
- If one side of the roof has more snow on it than the other side, start removing snow from the side with the most snow.
- Long buildings may require that you remove the snow from a portion of the roof, preferably in the center of its length, on one side of the building before proceeding to the same area on the other side of the roof.
- Repeat the procedure until all snow is removed from the roof.
Additional Resources
- 7 Tips to Protect Farming Buildings from Heavy Snow Loads. Dairy Herd Management.
- Heavy Snow Loads. Cornell Cooperative Extension.
- Prevent roof collapses from snow and ice. University of Minnesota Extension.
- Roofs Should Hold Normal Snow Load. North Dakota State University Extension.
- Snow and Roof Overload. West Virginia University Extension.
- Snow Loads on Buildings. University of Minnesota Extension.
- Snow Loads on Farm Buildings. University of Wisconsin-Madison Extension.
- Snow Loads on Roofs. JLC (Journal of Light Construction) Online.
- Snow Load Safety Guide 4: Measures to Reduce the Potential of Snow Load-Induced Structural Failures. Federal Emergency Management Agency.