I have been in lots of public places and in some homes, too, where I have seen plants that have just gotten too big for their location. In fact, the large building that I used to work in often ended up as a sanctuary or in some cases dumping ground for those plants that just got too big or too tall. Some of those plants are still in that large space but a few were moved on to the compost pile too because they had pest or disease problems on top of being too big. If a plant gets too big, often you can prune it back. But there is a fun alternative called air layering that you might want to try too. As a bonus, you end up with an additional, smaller plant, that you can use as a replacement for the original plant, put it someplace else or share with a friend.
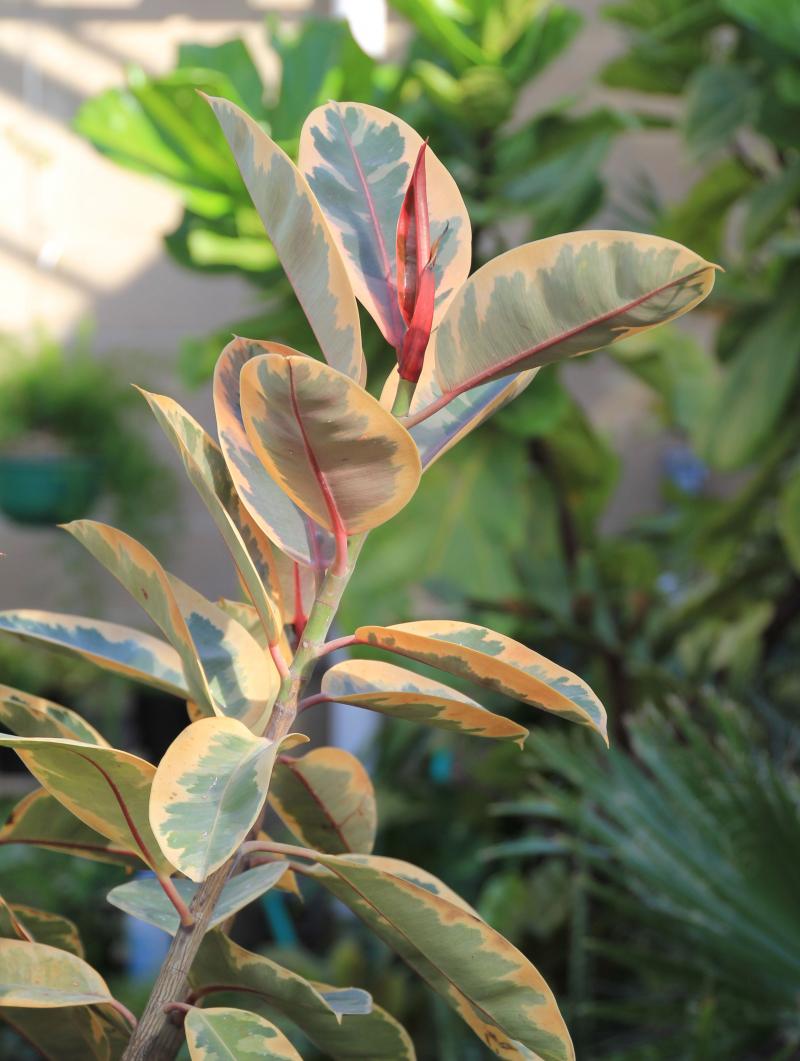
Layering is a process of plant propagation where a plant stem can develop a new set of roots while still attached to the parent plant. This happens quite often in nature if a branch or vine is lying on the ground, it might form roots and become its own plant. It is an important means of propagating some plants that are otherwise difficult to propagate because cuttings don’t work well or they do not produce any seed. Many of the larger plants that we see in homes or businesses fall into this category. One of the most common is the rubber tree or Ficus elastica. (This is a good name for this plant because it is related to the plants which are used to make rubber. ) Anyway, it can tend to grow pretty tall, easily up to 6-8’ which can be too tall for many locations, particularly in a smaller home. You can cut it back which will shorten the height and also encourage new branches to form but if you want to give one to a friend, air layering is worth a try.
Air layering is pretty simple. It is like the example I gave before where a branch will root into the ground but in this case, we provide a good place for roots to form on a branch up in the air, hence the name of air layering. You will need a few supplies, including: plastic wrap, twist ties, sphagnum moss or peat moss, a sharp knife or single-edged razor blade, some rubber or latex gloves and some rooting powder. I am using a rubber tree for this article but there are many other kinds of plants that can be used instead. It will work best for the plants that have a large stem, usually ½” or larger. One thing to take note of is that some of the larger-stemmed plants, like a dumbcane, will need to be done a little differently because they have a different stem structure than a rubber tree - more on that later.
First put on your gloves, preferably some of the thin surgical kind of gloves that you can pick up in a hardware or big box store, often in the painting section. Then you need to select the stem you want to work on and where you want to do the air layer. You might be tempted to do it on a stem near the bottom of the plant but it is better to pick a healthy stem with several leaves near the top of the plant. The younger the stem, the easier it will be to get new roots to form and it will also be easier for the newly rooted plant to get reestablished once it gets removed from the parent plant and planted in its own pot.
Leave 3-5 leaves at the tip of the stem then remove enough leaves so that you have exposed stem about 6” long. You might want to do this over a sheet of plastic or drop cloth because the white sticky sap will drip out once you remove the leaves.
Next you have to create a wound in the stem to stimulate root formation. The upper leaves and upper bud produce a plant hormone called auxin. It normally flows down from the top of the plant to lower parts of the plant. By making a wound in the outer layers of the stem, particularly the phloem tissue, the natural flow of auxin is interrupted so that it will accumulate at the wounded area. This buildup of auxin will help to stimulate new roots to form. Food manufactured by a plant’s leaves also flows down to the rest of the plant in the phloem. Wounding, or in this case, girdling the stem, will also allow that food (carbohydrates) to accumulate at the wound to provide the energy needed to produce the roots.
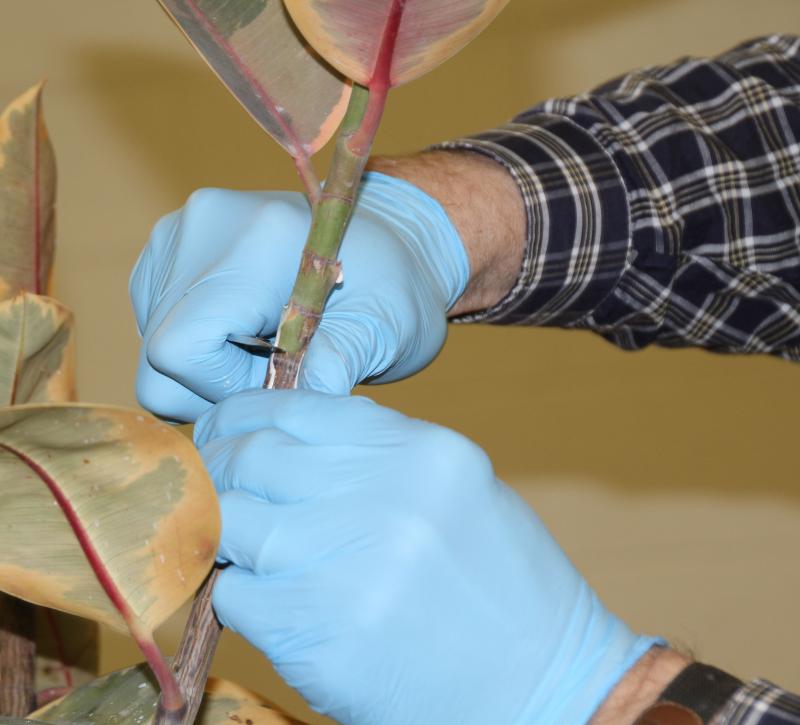
Here is where the sharp knife comes in, so be very careful. You need to make a circular cut around the stem of the plant about 2” down from the last leaf you removed at the top of the stem. You want to cut through the outer layers of the stem, the epidermis/bark, phloem and cambium. You should be able to tell that you will find a harder central core, the xylem or real “wood” in the center of the stem. You want to leave that intact if you can. If you cut too deeply and cut the wood, the stem will probably just break off. If that happens, don’t worry, just move down the stem and start the whole process again.
After you cut all the way around the stem, make a second cut, 1-2” below the first one. Now the tricky part, try to make a few downward cuts in the section of bark between the two circular cuts you already made. Again, try to make some cuts down to the inner core of wood or xylem, so that you can then use the tip of your knife to remove the section of stem. You will likely see some green tissue, the cambium, close to the inner, creamy-white xylem tissue. Try to remove that greenish tissue with a few more careful slices or scrapes with the knife should help. You want to try to get rid of any big strands of phloem or cambium or else the wound may just heal up and you won’t get any root formation.
Earlier I mentioned that some plants, like a dumbcane (Diefenbachia) have a different kind of stem structure, more like stalk of corn, than the trunk of a young tree. If you are trying to air layer one of those plants then you will need to alter your technique to make the wound with a slanting upward cut into the stem, about 1/3 of the way through the stem. Put a piece of tooth pick into the wound to try to keep it open.
Now take a look at the packet or bottle of rooting powder. Take note of the active ingredients. It will probably say IBA short for 4-Indole-3-Butyric Acid or indole-3-acetic acid which is the most common auxin that is used in rooting powders and solutions. There are other natural and synthetic auxins that may be used with or instead of the IBA however. Read the directions as to how to use the product but generally I use the tip of my knife to get a little of the powder onto the girdled part of the stem. You don’t need a lot, so don’t coat the plant in rooting powder. Close the container back up and save it for when you want to do other air layers or maybe some stem cuttings of your other houseplants.
We now have to create a good environment for roots to develop. We will use long-grain sphagnum moss or peat moss to do that. You should be able to find these at your local garden center or discount store in the plan section. If you cannot find the sphagnum moss, the peat moss will work too, it will just be a little trickier. Place a couple good sized handfuls of the sphagnum or peat moss into a small bucket of warm water. Mix it around until it is thoroughly saturated. Pick out any big sticks or stems. Get a sheet of plastic wrap ready, probably about 12-16” long. If you can have someone help you with this next step it will be a lot easier. Grab about 2 cups of the wet sphagnum moss and squeeze most of the water out of it. You want it to be moist but not dripping excessively. Try to wrap this around the girdled portion of the stem as best you can so that there is about an inch of sphagnum covering the girdled area all around, above and below it. It will help to try to firm it around the stem. Try to get any strands that are sticking out, pulled into the ball. If strands of the sphagnum stick out, that could cause the whole ball to dry out and reduce the chance of getting roots to form. Now get your helper to wrap that ball of sphagnum with the plastic wrap. If you lose the ball and it falls out, pick it up and try again. Use a twist-tie to secure the bottom of the ball, then the top. You can do it in either order but if you get the bottom tight you are less likely to have the sphagnum fall out while you are securing the top. I like to use a long twist tie so I can wrap it around the stem a couple times. You need to wrap it fairly tight to seal the moisture in and prevent the sphagnum from drying out. But you don’t want it too tight that you create a new wound on the stem, above the moistened sphagnum moss.
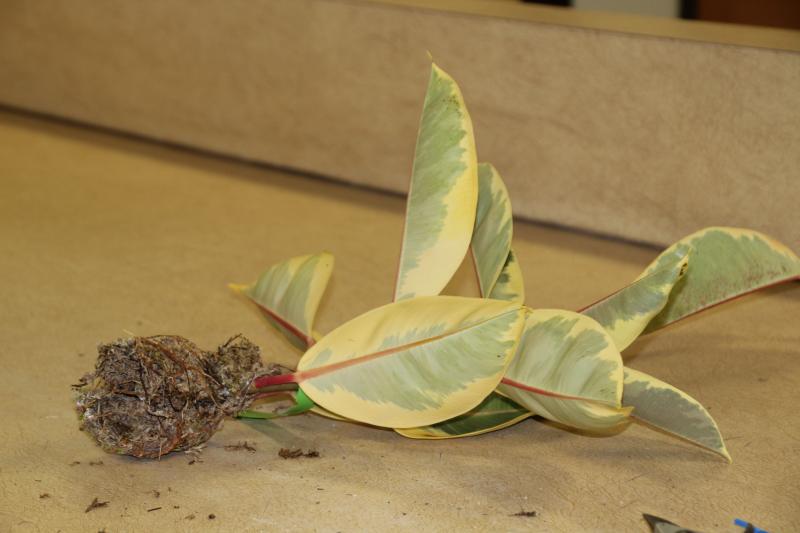
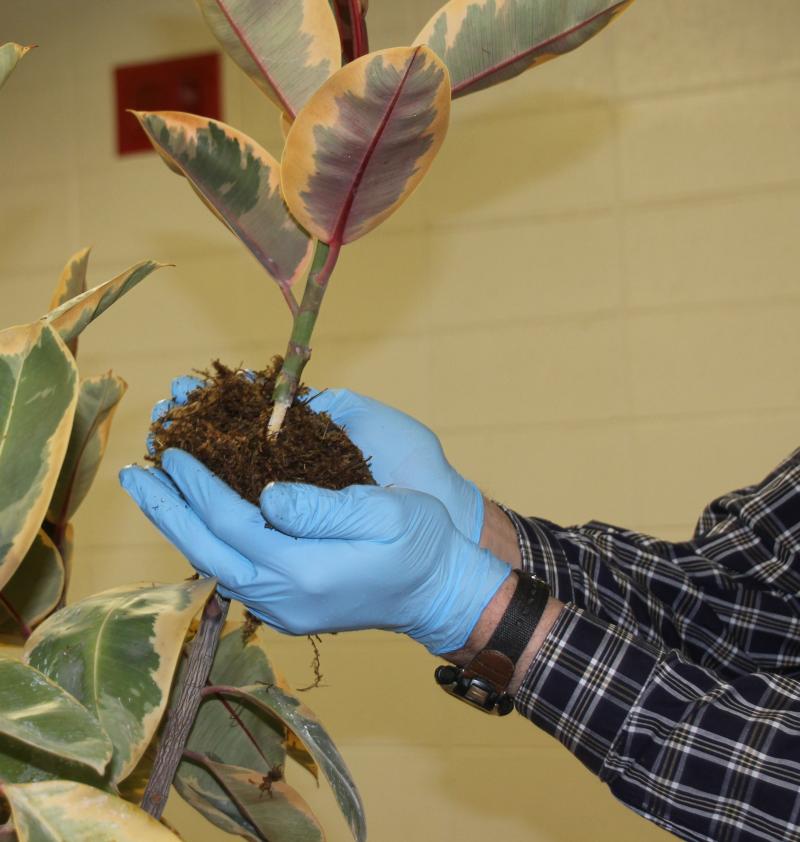
That’s it; you just have to wait now for new roots to form. That will usually take about 6-10 weeks. In the meantime, put the plant back where it was growing before. Check the air layer bundles to make sure they are staying moist. If it gets dried out it will feel more crunchy. You can open one end and add some more warm water to try to remoisten them but often times the air layer will not work if it dries out for too long. When a fair number of roots become visible inside the plastic wrap it is time to remove it and give your new plant its own pot. Cut the stem off the main plant, just the next leaf below the air layer. Remove the twist ties and plastic wrap, trim off any excess remaining stem below the new roots and pot it up. If the sphagnum moss seems really dry, it would be good to soak it in room temperature water for an hour or so to soak it up before potting. Water the plant thoroughly after potting too.
The last thing you can do is take another look at the old plant. Since you hopefully did your air layer out near the end of a stem, you might want to still cut the plant back further than you did. Now is a good time to do that. Typically you will see the buds at the next few leaves grow out to produce new stems. If you want them to be lower down on the plant, cut them back further. Keep in mind though, that the older the stem tissue, the less likely the stem will have buds that grow out.